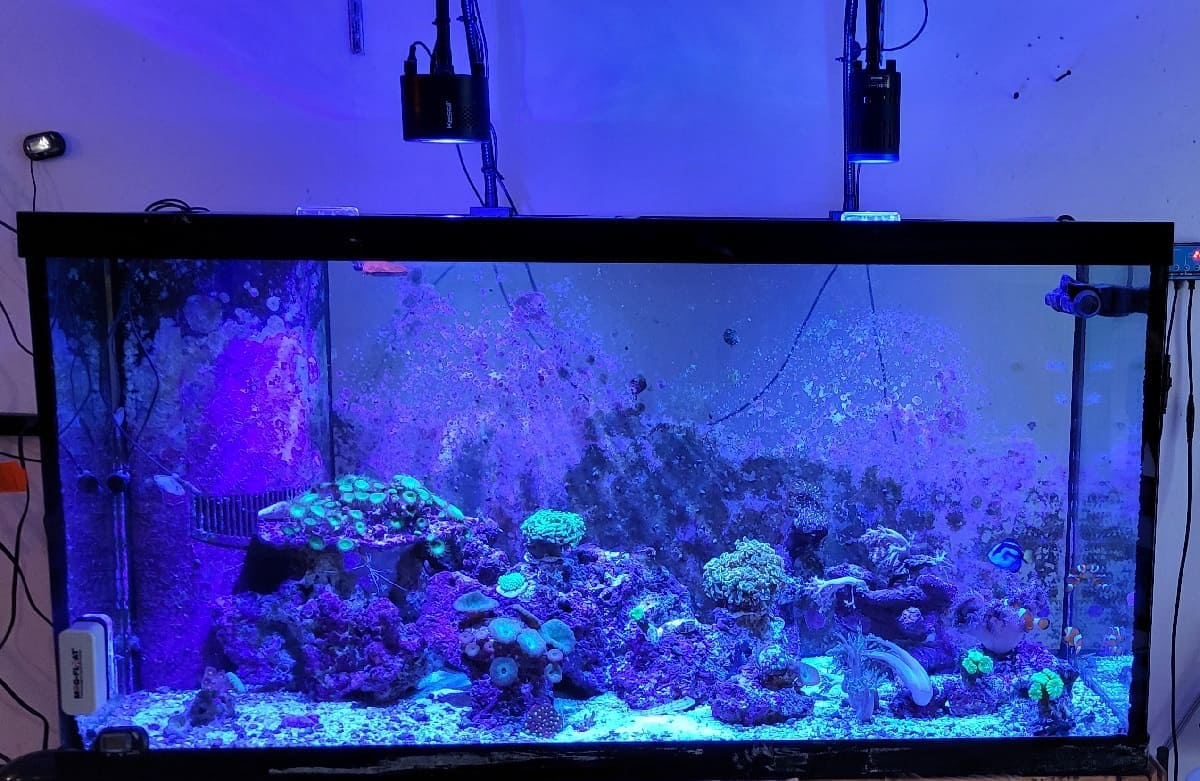
Embarking on the journey of setting up a 90-gallon saltwater aquarium is an exciting venture that opens the door to a mesmerizing underwater world. This comprehensive guide will walk you through the intricate steps of creating a thriving marine ecosystem within the confines of your home. From choosing the right equipment to establishing a stable environment, let’s dive deep into the process of setting up your 90-gallon saltwater aquarium.
Step 1: Planning and Research:
Before acquiring any equipment, take the time to plan and research. Decide on the type of marine life you want to keep—whether it’s colorful fish, vibrant corals, or a mix of both. Research the specific requirements of your chosen inhabitants to ensure a compatible and sustainable environment.
Step 2: Acquiring Equipment:
Gather all the necessary equipment and supplies for your saltwater aquarium. This includes the 90-gallon tank, sump pump, protein skimmer, heater, thermometer, lighting system, live rock, sand, salt mix, and water testing kits. Investing in high-quality equipment will contribute to the long-term success of your aquarium.
Step 3: Choosing a Suitable Location:
Select a stable and level location for your aquarium. Ensure it’s away from direct sunlight and free from temperature fluctuations. Placing a waterproof mat or foam beneath the tank adds support and helps distribute the weight evenly.
Step 4: Setting Up the Sump System:
The sump system is a critical component of a saltwater aquarium. Install the sump beneath the aquarium stand and connect it to the main tank through an overflow box or drilled holes. The sump pump aids in maintaining a constant water level and provides additional water volume for stability.
Step 5: Adding Substrate and Live Rock:
Create a natural and visually appealing environment by adding aragonite sand to the Ecosystem Filtration System Miracle Mud as the substrate. Rinse the sand thoroughly to minimize cloudiness. Arrange live rock strategically to create caves and hiding spots for fish while promoting the growth of beneficial bacteria.
Step 6: Mixing and Adding Saltwater:
Follow the manufacturer’s instructions to prepare the saltwater mix. Fill the aquarium with the mixed saltwater, leaving space for water level adjustments due to evaporation. Use a hydrometer or refractometer to measure salinity and maintain it within the desired range.
Step 7: Installing Heater and Thermometer:
Maintain a stable water temperature by placing the aquarium heater in the sump. This prevents the heater from being visible in the main tank. Attach a reliable thermometer to monitor and adjust the temperature as needed, keeping it within the optimal range for marine life.
Step 8: Integrating a Protein Skimmer:
Enhance water quality by installing a protein skimmer in the sump. This essential component removes organic waste and impurities, promoting a cleaner and healthier environment for your marine inhabitants.
Step 9: Setting Up the Lighting System:
Choose a lighting system that suits the needs of your chosen marine life. Adjust the intensity and duration of the light to mimic natural daylight cycles. Research the specific lighting requirements of corals and fish to provide an optimal environment.
Step 10: Cycling the Aquarium:
Allow the aquarium to cycle for several weeks before introducing any fish or invertebrates. During this period, beneficial bacteria establish themselves, helping to break down ammonia and nitrites. Regularly monitor water parameters using testing kits to ensure a stable and safe environment.
Setting Up Your Aquarium's Heart
This guide will walk you through the step-by-step process of setting up a sump for your 90-gallon saltwater aquarium, unraveling the mysteries behind this vital component.
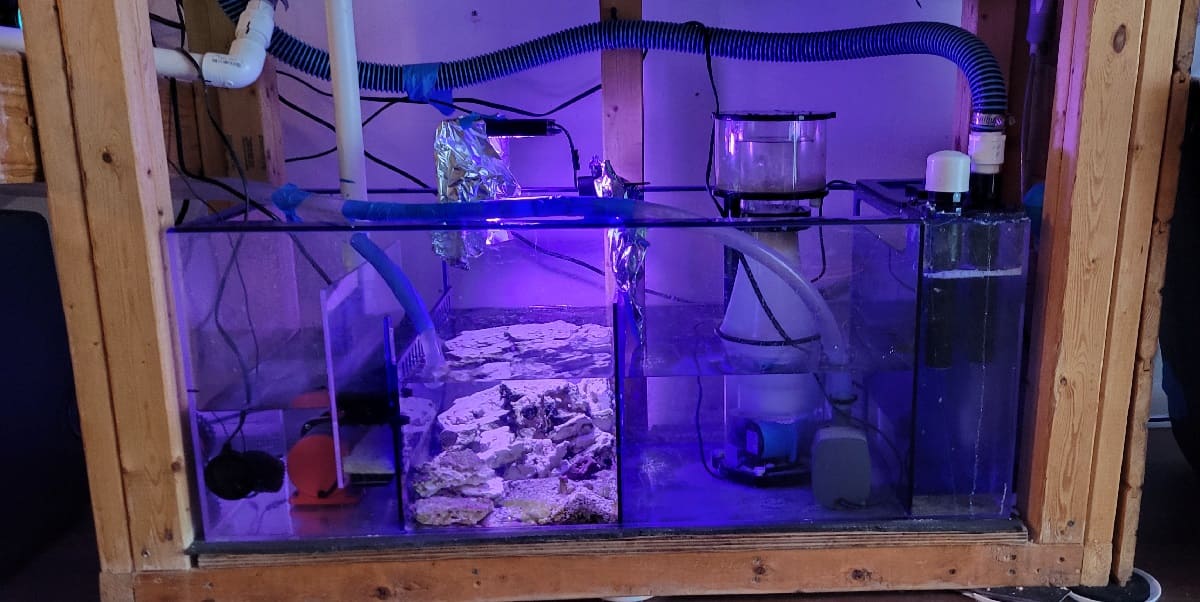
Step 1: Understanding the Purpose of a Sump:
Before diving into the setup, it’s crucial to grasp the role of a sump in your aquarium system. A sump serves as a secondary tank placed beneath the main display tank. It houses essential equipment, such as a protein skimmer, heater, and other filtration components, while also providing additional water volume for increased stability.
Step 2: Choosing the Right Sump:
Selecting an appropriate sump for your aquarium involves considering factors such as size, design, and features. The sump should fit comfortably in the space beneath your aquarium stand, allowing easy access for maintenance. Consider a sump with multiple chambers to facilitate efficient water flow and separation of equipment.
Step 3: Installing the Overflow System:
The overflow system ensures a continuous water supply to the sump. This can be achieved through an overflow box or drilled holes in the main tank. The overflow box allows water to flow into the sump via a gravity-fed process, while drilled holes use a bulkhead fitting to maintain water levels. Ensure proper sizing and installation to prevent flooding and maintain a consistent water level in the sump.
Step 4: Placing the Sump Pump:
The heart of the sump system is the pump. Place the sump pump inside the designated pump chamber of the sump. This pump will draw water from the main tank and return it after passing through various filtration components. Choose a reliable and appropriately sized pump based on the total volume of water in your aquarium.
Step 5: Setting Up Filtration Components:
Within the sump, you can incorporate various filtration components to enhance water quality. Install a protein skimmer to remove organic waste and impurities. Consider adding filter socks or mechanical filters to capture debris. The use of biological media, like ceramic rings or live rock, aids in establishing beneficial bacteria colonies.
Step 6: Configuring Water Flow:
Proper water flow within the sump is crucial for efficient filtration. Arrange baffles or dividers in the sump to create distinct chambers for different filtration stages. This helps regulate water flow, prevents direct water entry into the pump chamber, and promotes optimal performance of filtration components.
Step 7: Adding an Auto Top-Off System:
An auto-top-off system helps maintain a stable water level in the main tank and sump by automatically replenishing evaporated water. This ensures consistency in salinity levels and minimizes fluctuations in water parameters.
Step 8: Testing and Adjusting:
Before connecting the sump to the main tank, conduct a thorough test to ensure all components are functioning correctly. Check for leaks, confirm proper water flow, and monitor the overall performance of the sump system. Make the necessary adjustments to optimize functionality.
Step 9: Connecting the Sump to the Main Tank:
Once satisfied with the sump’s performance, connect it to the main tank. Use appropriate tubing and ensure a secure connection to maintain a seamless flow of water between the two tanks. Monitor water levels to confirm the proper functioning of the overflow system.
Step 10: Regular Maintenance and Monitoring:
Routine maintenance is key to the longevity and effectiveness of the sump system. Clean filter socks, empty skimmer cups, and inspect equipment regularly. Monitor water parameters within the sump to ensure optimal conditions for beneficial bacteria and overall aquarium health.
Conclusion:
Setting up a sump for your 90-gallon saltwater aquarium is a pivotal step in creating a thriving marine ecosystem. By understanding the purpose of the sump, choosing the right equipment, and following these detailed steps, you’re laying the foundation for a system that contributes significantly to water quality, stability, and the overall health of your aquarium. Stay tuned for the next part of our guide, where we’ll explore the finer aspects of maintaining and caring for your saltwater aquarium. Get ready to witness the beauty of your marine world, flourishing with vitality and color!
